Showing posts with label recipes. Show all posts

Wednesday, May 22, 2013

Blueberry Muffins

I need things that are quick and easy to take for breakfast, as I get up before I am even hungry. So I am usually either eating in the car or eating my breakfast at my desk. But I get sick of meal bars and what have you, so I tend to need to switch things up and therefore thought I would bake some muffins, freeze them and then I can just grab them on my way out the door in the morning.

Here's What You Need:
  • Muffin/Cupcake liners
  • 2 cups all-purpose flour
  • 1 cup oats–quick or regular oats, plain
  • 2/3 cup sugar
  • 1 teaspoon baking powder
  • 1 teaspoon baking soda
  • 1/2 teaspoon salt
  • 12 ounces honey nonfat Greek yogurt
  • 2 large eggs, lightly beaten
  • 4 tablespoons unsalted butter, melted and slightly cooled
  • 1 teaspoon vanilla extract
  • 1 cup fresh blueberries
Start by preheating your oven to 350 degrees. Then line your cupcake tin with the liners (the recipe I followed said that this would make about 12 muffins depending on how much you filled the tins, but I was actually about to make 24. I dunno, I could have filled them more I guess, but still 12 seems like too few for the amount of batter you end up with.).


Next combine flour, sugar, oats, baking powder, baking soda and salt in a bowl. Set aside.

Then combine yogurt, eggs, butter, and vanilla in a second bowl. I should note here, for whatever reason it is hard to find the honey Greek yogurt by me..drives me crazy. BUT if this is the case for you as well, you can just mix in honey with the yogurt before mixing with the rest of the ingredients.

ALSO if you are like me and rushing to get these done on a Monday night and therefore have to at the last second melt the butter, make sure to temper the mixture with the hot butter first before just dumping it in with the eggs (otherwise your eggs will scramble, which you dont want). This simply means add a little bit of the hot butter to the mixture, mix it in well, then slowly add the rest of the butter.

Fold yogurt mixture into dry mixture; stir to combine completely.

Gently fold in the blueberries.


Spoon the muffins into the tins. As I mentioned earlier this will yield anywhere from 12 to 24 muffins, depending on how much you fill your tins. I stuck with about 3/4 full and got 24 muffins.

Bake for about 20-25 minutes or until the tops are golden.

I think I baked mine for slightly too long as they are a little dry in my opinion, but my Dad didn't have the same complaint, so might just be me. Overall good though and great for taking with me in the morning.

~Jessica


Sunday, April 28, 2013

How to get guilt-free cocktails

I have had a recent obsession with mojitos. I can't get enough. Could be the arrival of spring, but they so fresh and so clean.

My mom is coming to visit soon and she loves mojitos about as much as I do. So I will make her some! But today is not so much about the cocktail, as it is the ingredients. I'm always trying to create a more well-rounded bar in my home, but it's quite the investment, so I've been doing it ever so slowly. I'm making a simple syrup to keep around for cocktails. Since my mom is a bit more calorie conscious than I am, I thought I'd make a Stevia version. I read online that there are two different styles of simple syrup. The 1:1 ratio of sugar to water is "simple syrup," or there is the 2:1 ratio that is "rich syrup," which is supposedly the more preferred version among bartenders. Today, I used the 1:1 because artificial sweeteners tend to be sweeter than natural sugar.

I measured how much my container could hold. Then, I boiled water. In a small bowl, I poured 1 cup of Stevia and 1 cup hot water and stirred. Should be a useful recipe in the coming summer months.
:P < drunk face

Love,
Kelly


Wednesday, April 17, 2013

Lightened Up Mac N Cheese

I have had a crazy craving for mac n cheese lately. Like the good, super cheesy, baked kind (not that boxed stuff). So I went on a hunt for a "healthier" version of a mac n cheese recipe, and found one on Eat Yourself Skinny. I was super excited about it and decided to make it for the fam last night.

Here's What You Need:

1 (14.5 oz) box Ronzoni Smart Taste elbow macaroni
1/2 head cauliflower, trimmed and cut into florets
1/2 cup Italian bread crumbs
4 Tbsp reduced-fat grated Parmesan cheese
8 oz. grated sharp cheddar
4 oz. fat-free cream cheese
1/2 cup fat-free half-and-half
1/2 tsp. salt
1/2 tsp. ground black pepper
1 Tbsp flat-leaf parsley, chopped

First preheat the oven to 350 degrees. Bring a large pot of water to a boil...while you wait you can mix your dry ingredients:  In a small bowl, combine Italian breadcrumbs, 1 tablespoon of the Parmesan cheese and the chopped parsley together and set aside. 


Now if things go for you the way they always seem to go for me, and your water takes FOREVER to boil, you can take this time to measure out all of your ingredients. I was actually able to do all of my chopping and measuring while I waited. And if your water still hasn't boiled, do like me and crack open a beer and enjoy while you wait. 

Once your water is boiling, add macaroni and cauliflower. Cook until macaroni is done, then drain, but RESERVE half a cup of the water from the pasta.

Place cheddar, cream cheese, 3 tablespoons of Parmesan cheese, half-and-half, salt and pepper in the already heated pot you just used and mix in the macaroni and cauliflower. Stir until pasta is well coated, then add the water you reserved from the pasta.

Pour the mixture into a greased 9x13 pan. 

Then top with your dry mixture. Bake for 18-20 minutes.

Now I'm going to say here that I was not actually all too thrilled with the end result. It wasn't bad, just kind of plain. The parent's claimed to like it, but it's possible they were just being nice. If I make this again I will definitely be adding more herbs and spices to it to ramp up the flavor a bit. But maybe it's just me.

~Jess


Saturday, March 23, 2013

Mexican Salsa Recipe

My good friend Angelica made this salsa recipe in college and it is addictively delicious. I've made it myself several times since and it is way better than any salsa you can get in the store or restaurant! it is a pico de gallo style salsa.

Ingredients, yields amount for a small gathering 4-6 ppl:
4 Roma tomatoes
1 lime
1/2 small onion
1 jalapeño
1/3 c cilantro, finely chopped
1tsp salt
1 tsp garlic powder

Dice tomatoes, onion, and jalapeño. Place in medium sized bowl. Mix in cilantro and squeeze in juice of 1 lime. Sprinkle salt and garlic powder over mixture. Stir together. Chill and serve!

Thanks Angelica!! >^^<


Sunday, March 17, 2013

St. Patty Cakes

Happy St. Patrick's Day! How did you wake up this morning? Personally, I was wearing my huge headphones and had every light on in my room. It took a while, but I eventually got up to make some festive pancakes.

I added 6 drops of green food coloring to achieve this "desired" shade. haha.


Love, 
Kelly

Saturday, March 2, 2013

Easy Meatball Recipe


Jackie Scutella’s Meatball Recipe (yields 30 meatballs)

I eat so much before 3 PM at work, that I usually don't need much for dinner. I generally just get a 2 ft baguette with some butter and call it a regretful day. That's not so healthy. So, I thought I'd add some protein to my weekday meals. I made this recipe for the first time today and it was so easy (and delicious)! 


SAUCE
  • 45 oz marinara sauce
  • 1 small can of tomato paste
Pour tomato paste in a small bowl and add 1 can of water. Heat in the microwave for 30 secs and stir. Heat for another 30 seconds until the mixture is smooth. Pour marinara and paste in saucepan. Bring to a low bubble.


BALLS
  • 2 lbs of ground beef
  • 1 cup Italian bread crumbs
  • 4 stale hamburger buns
  • 1 1/2 cups of good grated Italian cheese, preferably Romano or Pecorino
  • 2-5 cloves of minced garlic, to taste. (I used 5 - I happily have no friends)
  • 3 free-range eggs
  • 1/4 cup chopped fresh parsley


Soak the hamburger buns in water, then squeeze the water out. Tear the bread into small pieces. Then, mix your ingredients by hand in a very large bowl. Roll into 1” balls. Drop meatballs into bubbling marinara sauce. Cook for 45 minutes.

I followed this with Spumoni, which was a great investment. 


Thanks Jackie and Ernie!
Love, 
Kelly

Sunday, February 3, 2013

The Breakfast Shot

Last weekend I visited my mom in Erie, PA. They are known for a few things. Their beautiful Presque Isle peninsula that contains 21 miles of recreational trails and 13 beaches, a high Italian-American population, which results in delicious restaurants and chocolatiers, like Serafini's and Stefanelli's, and no tax on clothing, so obviously great for shopping. I didn't grow up there, but spent so much time there visiting family as a child, I often felt like I did.

This most recent trip though, I discovered something miraculous at Eduardo's Tavern. It is called a "breakfast shot." Wow. It literally tastes like pancakes with a side of OJ.

The Breakfast Shot


Ingredients
1.5 oz Jameson Irish Whiskey
.5 oz Butterscotch Schnapps
2 oz OJ

Pour the Jameson and Butterscotch Schnapps in a shot glass. Drink the shot. Sip the OJ as a chaser.

Om nom nom durnk.

Love,
Kelly

Friday, January 25, 2013

Rosemary just needs a little Thyme: A Bread Story

I want to be one of those people that cooks bread in a hearth. Instead, I have a rented oven with an inaccurate thermostat. BUT, I do have a thermometer that lets me know what the hell the thermostat is up to these days.


Ingredients:

4 cups unbleached bread flour
1 tsp active yeast
1 tsp granulated sugar
2 tsp salt
1 stick melted butter
1 1/8 cup warm water
2 tbsp freshly chopped rosemary
2 tbsp freshly chopped thyme

Mix all dry ingredients together in a very large bowl.


Add chopped herbs to melted butter. Mix wet ingredients in small bowl.

Stir together for several minutes, then move in with your hands.

Knead until the dough no longer has CRACKS everywhere. I'll say it again. CRACKS. I love Mean Girls. This bread does not rise much, so shape into the desired form. Cover with Saran wrap. Let the dough sit for 1-3 hours. Cut an "X" in the center.


Preheat oven to 350 degrees. Place bread on middle rack. Cook for 20 minutes, then place aluminum foil over top to prevent the top from burning. Let cook for a remaining 20 minutes.


This bread is very dense and savory and delicious. It has a thick crust and chewy center. Very tasty. I gave some to my work buddies, and let me just say since we're amongst friends, it got rave reviews :)

Love,
Kelly


Wednesday, January 23, 2013

Chicken Pot, Chicken Pot, Chicken Pot Pie!

It's been really f-ing cold lately. Like really, unbearably, terribly cold. In summation: "It's cold in the D!" (yeah, I said it). Therefore I want filling, warm, comfort food. Enter the Chicken Pot Pie. Downfall of this amazing comfort food is it is not usually that all that good for you, so I was reluctant to make it. But then I found this awesome recipe from one of my favorite food blogs Eat Yourself Skinny and had to try it. It is a slimmed down version of a chicken pot pie. Happy? Yes. Excited to try it? You bet. So let's do this.

What you need:

1.  1 cup fat-free half and half
2. 1 cup fat-free chicken broth
3. 3 Tbsp. all-purpose flour
4. 1 tsp. poultry seasoning
5. 1 tsp. thyme
6. 2 cups roasted skinless chicken breast, cubed
7. 1 (10 oz) package frozen mixed veggies, thawed
8. 4 green onions, chopped
9. 1 tsp. salt
10. 1/4 tsp. pepper
11. 1 can (7.5 oz) refrigerated reduced-fat biscuits

You will also need 5 (6oz) ramekins (the recipe says it makes 5, but it only made 3 for me, I dunno maybe my ramekins were bigger than 6oz)

First off, preheat your oven to 425F.

Then chop your shit (and by that I mean the onions and chicken)

Part of what made this recipe so great was that we had leftover chicken anyway, so I didn't have to worry about cooking it. 

After everything is chopped, in a medium saucepan whisk together the half and half, broth, flour, poultry seasoning and thyme. Bring to a boil, then reduce to a simmer...continue to whisk for about 4 minutes until the sauce has thickened. Remove from heat and add your veggies, chicken, green onions and salt and pepper. Cover and set aside.


On a lightly floured surface roll out the biscuits into about 4 inch rounds. Spray each of the ramekins with cooking spray. Evenly fill the ramekins with the chicken mixture. Cover each ramekin with the rolled out biscuit. Press the dough to the edges of the ramekins to hold in place, then cut 4 holes in the top of the dough.


Place the ramekins in the preheated oven and bake for 12 minutes. Now I say 12 minutes as that is what the recipe I followed said. BUT mine burned. Thats right, the dinner I was SO excited about, burned. 

 
I was extremely sad, to say the least. SO I say do more like 10 minutes...or just really pay attention. Remember all you are doing here is baking the crust, the rest is cooked already. 

In spite of burning the edges of the crust a bit, the rest was still very good. And I would never have guessed it was slimmed down from your typical pot pie. So I would definitely do this again, but just pay better attention to the baking portion.


~Jessica


Wednesday, January 16, 2013

Slow Cooker Chicken Fajitas...sort of

So once again I am trying to eat healthy and actually do that whole working out thing. Which I hate, so we'll see how this goes. But with that being said I have been on a healthy recipe search and in my quest came across this little gem: Slow Cooker Chicken, which I figured would be really good in fajitas, or tacos, or something of the like. Plus the recipe sounded super easy. I love slow cooker meals...throw shit in a pot and let it sit all day, come home and dinner's ready..BAM! What more could you ask for?


Here's what you need:
2 pounds (32 ounces) chicken breasts, boneless and skinless
1 cup salsa, homemade or purchased
1 cup petite diced canned tomatoes (choose low-sodium)
2 tablespoons taco seasoning
1 cup onions, diced fine
1/2 cup celery diced fine
1/2 cup carrots, diced
3 tablespoons sour cream, reduced fat
2 bell peppers (I chose red and yellow, primarily because they were on sale and I'm cheap)
1 cup shredded lettuce
1 cup shredded cheese (choose whatever kind of cheese you like here)
8 flour tortillas

recipe yield: 8 servings (supposedly, seems to be a lot more than that to me though)

 
Hhhokay, so, first chop the carrots, celery and onions. I know the ingredients say diced, but I went with more of a rough chop and it was fine, but I am impatient and hate dicing things. So it's totally up to you on the size here.


Your chicken is probably close to good to go, but make sure that you rinse it with water first. I also like to trim up the edges a bit as well...get off that extra skin and random hangy parts that tend to be left on boneless, skinless chicken breast. Again, that's a personal preference thing, so you could just use them as they come out of the package.

Place the chicken in the slow cooker...I ended up with two layers of chicken so I layered the other ingredients between the chicken layers. Then add the taco seasoning, onion, celery, carrots, salsa and 1/2 a cup water.


Set the cooker on low, cover it, and let it cook for 6-8 hours. The meat is cooked when it shreds, or when it reaches an internal temperature of 165°F. I turned mine on before I went to work, and by the time I came home the chicken literally fell apart as I was taking it out of the cooker...which is what you want. Take the chicken out and shred it. When you finish you can put it back in the leftover sauce that is in the cooker, and it will stay warm while you prepare the rest.

 
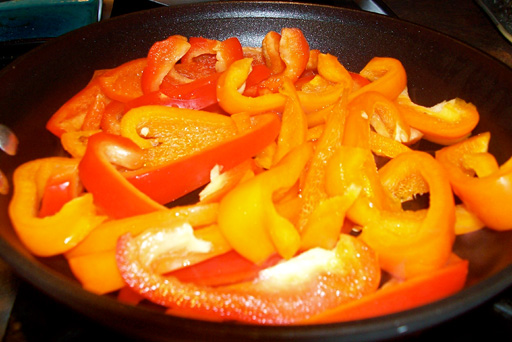
Cut the peppers into strips and place in a medium sauce pan. Cook on medium heat until the peppers begin to char a little (or until your desired level of cookedness, yes that's a word, because I say it is).  Stirring occasionally. While the peppers are cooking, warm the tortillas either in the microwave for about a minute or in the toaster oven. Also if your lettuce is not shredded already, you can do this now.


Once peppers are cooked assemble the fajitas to your liking. I did chicken, cheese, peppers, lettuce and a little sour cream. These were very tasty, super easy and we had a TON of leftovers, which means no cooking for the next couple of days (always a bonus). I will definitely make these again but probably cut down the recipe a little. So go on, give these a try and let me know what you think!

~Jessica


Wednesday, December 19, 2012

Brownies in a Jar

It's Christmas time and that means it's a super stressful time of year when you have to try to figure out what the Hell to get people for the holidays. I loathe this part of the holiday season. It is great if I know exactly what I want to get someone, but when I don't, or can't find what I want, boy does it suck. So this year I am making some of my gifts and I thought I would share one really quick, easy gift that is great for relatives, coworkers or even the in-laws.

Mason Jar Brownies!


2/3 t. salt
1 1/8 c. flour, divided
1/3 c. cocoa powder
2/3 c. brown sugar
2/3 c. sugar
1/2 c. chocolate chips
1/2 c. white chocolate chips
Please note this makes one jar

Also 1 quart size Mason jar (I suggest the widemouth kind...I did not use this and it made pouring ingredients in a bit more of a challenge).
And a ribbon or decorative top for the jar

Instructions:

In  a clean, dry canning jar, layer the ingredients as follows:
2/3 t. salt
5/8 c. flour
1/3 c. cocoa powder
1/2 c. flour
2/3 c. brown sugar
2/3 c. sugar
1/2 c. chocolate chips
1/2 c. white chocolate chips


I have a problem following directions, so mine is not in this order and therefore my colors are a little off...it doesn't matter in the sense of making the brownies, just in presentation, so I suggest following the order listed above.


Close jar and wrap the ribbon around the top. Include the following instructions:
Preheat oven to 350 degrees. Grease one 9x9 baking pan.
2. Pour the contents of the jar into a large bowl and mix well.
3. Stir in 1 teaspoon vanilla, 2/3 cup vegetable oil and 3 eggs. Beat until just combined.
4. Pour the batter into the prepared pan and bake at 350 degrees for 20 to 25 minutes. Cool and enjoy!


Ta-da! You're done! You may also add 1/2 a cup of walnuts or pecans to the top of this as well, I personally have family with nut allergies, so I decided to forgo that ingredient.

Friday, October 19, 2012

Pumpkin Ravioli


Are you ready for some pumpkin amazingness? I hope so. I recently found a recipe for pumpkin ravioli, via Eat Yourself Skinny.   

And seeing how I LOVE pumpkin, I just had to try it.

Here’s what you’ll need:


For the pasta dough:
5 eggs
1 tablespoon olive oil
1 tablespoon salt
3 cups all purpose flour

For the filling:
1 8oz can pumpkin (not the pie filling, just plain pumpkin)
1 cup ricotta (the recipe I followed used pecorino, but I could not find that at my local Kroger, and ricotta works just fine)
2 teaspoons nutmeg
1 teaspoon cinnamon
Dash salt and pepper

For the “sauce”:
3 tablespoons butter
Fresh rosemary and thyme (I used roughly a tablespoon of both)

(Recipe yields enough for six)

Alright, ready? Here we go!

Combine the eggs, olive oil and salt in a small bowl. In a large bowl place the flour, then add your egg mixture.  Use a fork to combine mixture with flour until it forms a sticky ball. Note: I actually had to add a little bit of water to my mixture, as it was too dry to form a ball. I added roughly 2 tablespoons of water, but if this happens to you, just slowly add water until it starts to form said ball (you don’t want to add too much water, just enough to make it stick).

Once ball is formed, flour your hands a little bit and divide dough into 3 sections. Knead each ball a little, then put in separate bowls, cover with plastic wrap and refrigerate for a couple of hours. You will want to make sure that your dough has enough time to chill as it is much easier to work with it chilled, than warm.

In the meantime, make the pumpkin mixture. Put the pumpkin, ricotta cheese, nutmeg, cinnamon and salt and pepper in a bowl and mix well. Refrigerate until ready to use.

Once the dough has chilled, roll it out on a floured surface. Try to get the dough as thin as possible, without it tearing.  I definitely could have rolled mine out thinner, as the raviolis themselves ended up being a bit thick in the end, so the thinner the better!

After it s rolled out, cut the dough into small squares. I found that 2x2 inch squares worked fairly well. Place a dollop (approx. 1.5 teaspoons worth, but will vary on your square size) of the pumpkin mixture in the center of a square then place another square on top. Take a fork and press the edges together. Be careful to not puncture the dough, but also make sure all the edges are sealed completely (otherwise water will get inside your ravioli, and it will probably explode when it is boiled).

Just a dollop

Aren't they cute?

Continue this until all your pumpkin mixture (or dough) has been used.


Boil well salted water. Once water is boiling, carefully drop in the raviolis. I found that doing a couple at a time worked best. They will probably stick to the bottom; so after they have been in for about a minute use a spoon to nudge them off the bottom. Allow them to stay in the water until they float (about 3-4 minutes). Carefully scoop them out and place them in a colander to rid of excess water.

Melt the butter. Just before it starts to brown, add the rosemary and thyme and allow it to brown slightly. Pour over the raviolis.

Step back and admire your work, then dig in! Try not to eat the whole plate, as you will want to, but enjoy!


This is seriously an amazing recipe, and won over even my dad, who was not at all excited that I was making this (it sounded really weird to him) but in the end decided this was a fall recipe to remember, and I couldn’t agree more!

~Jessica